If you’ve ever tried to detect ships in a harbor or planes on a runway from an aerial photo, you’ve probably hit the same wall: axis-aligned boxes are a poor fit. Objects in satellite and drone imagery sit at arbitrary angles. You want rotated boxes — oriented bounding boxes — not rectangles forced to align with the image edges.
For years, the go-to stack for this was MMRotate: powerful, but heavy. Custom ops, CUDA toolchains, Linux-first workflows. Fine on a training cluster, awkward on a MacBook.
oriented-det changes that. Built on PyTorch and torchvision, it has no compiled CUDA extensions to wrestle with. And it runs on macOS — including Apple Silicon via --device mps. Clone the repo, install it editable with pip install -e ., run one CLI command, and you’re looking at detections on a real aerial image.
This post walks through exactly that: from zero to result.jpg in a few minutes. It follows the v0.1.0 release using a local editable checkout of the repository.
What we’re doing Link to heading
We feed a DOTA-style aerial scene through Oriented R-CNN (ResNet-50 + FPN), pretrained on DOTA v1.0, and save an annotated image.
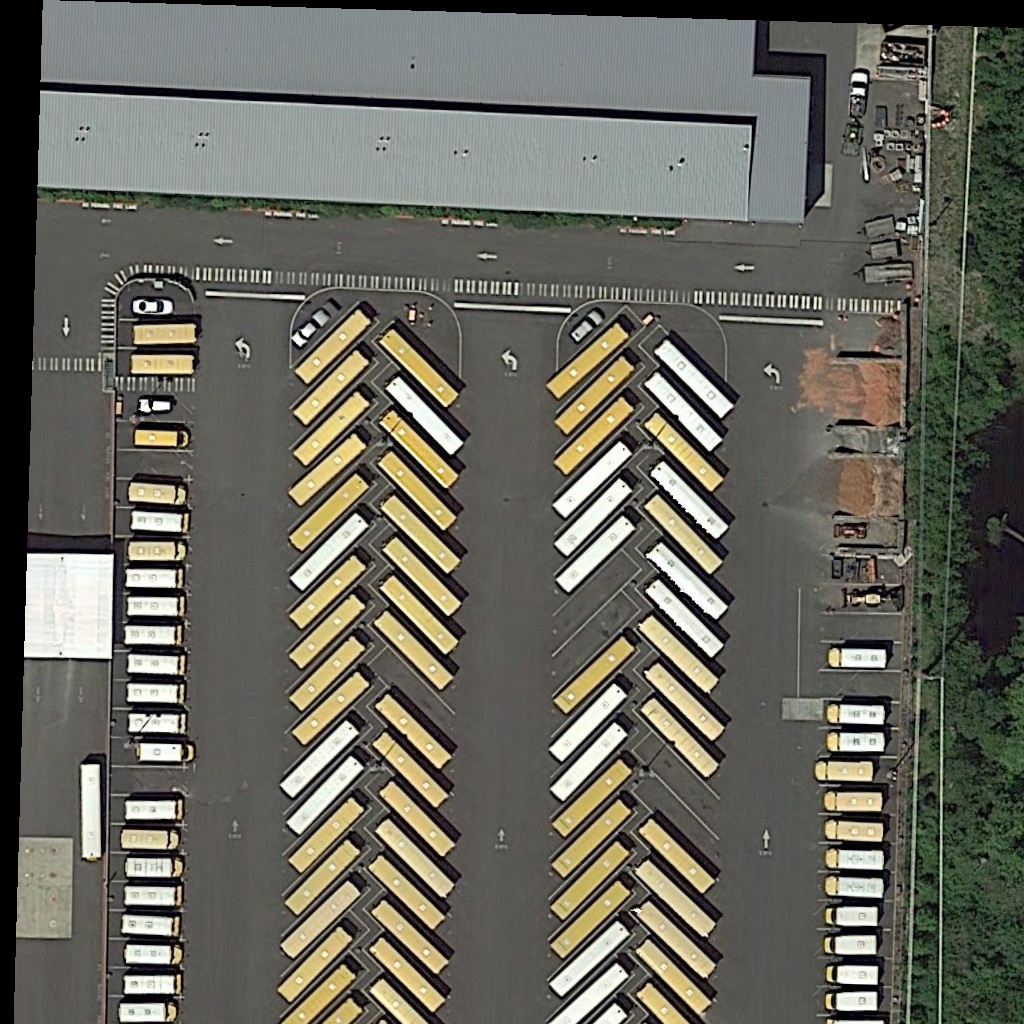
| Input | demo.jpg — a DOTA aerial tile with buses parked at diagonal angles |
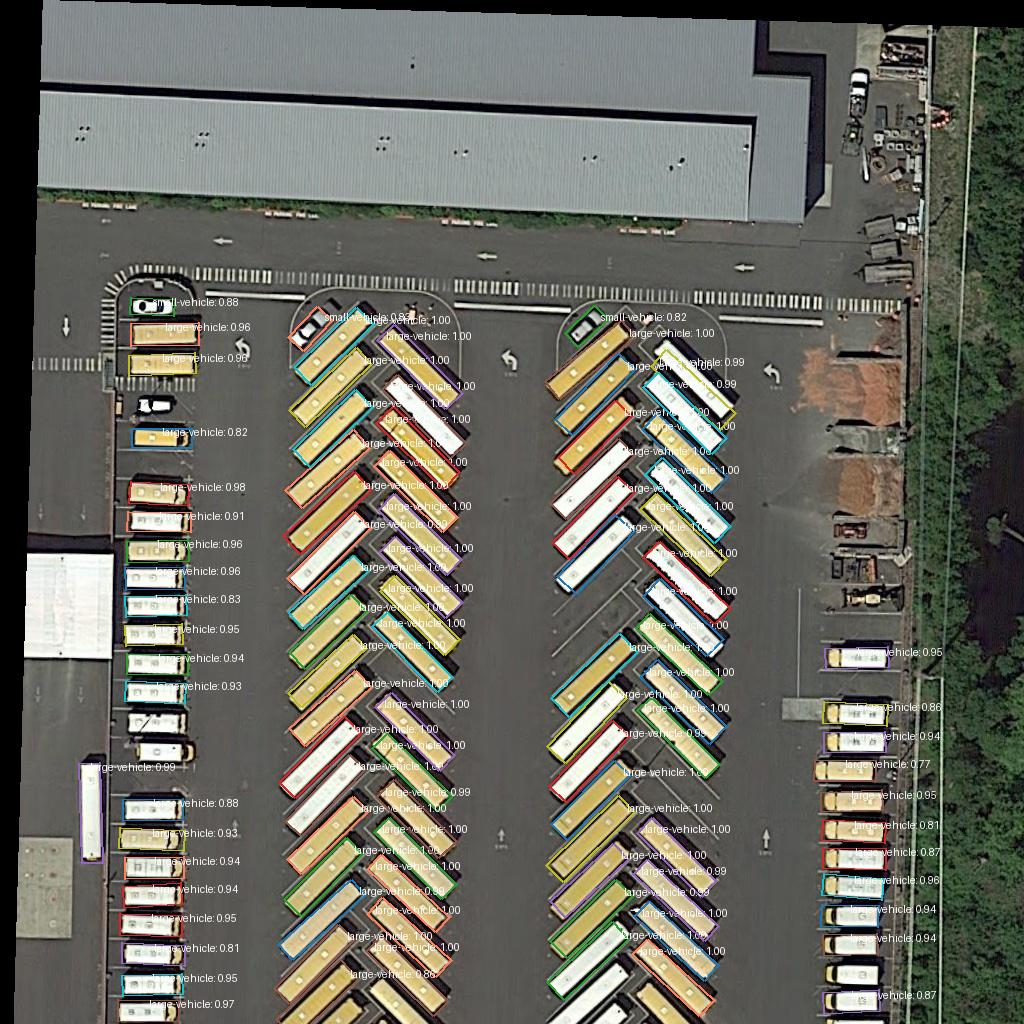
| Output | result.jpg — the same image with rotated bounding boxes drawn on it |
| Sweet spot | --score-thr 0.7 --nms-thr 0.1 (~94 detections on the demo image) |
Why Oriented R-CNN? Link to heading
Oriented-det ships three DOTA baselines — Oriented R-CNN, Rotated Faster R-CNN, and Rotated RetinaNet. Rotated Faster R-CNN and Rotated RetinaNet are solid starting points for fine-tuning, but they do not produce clean oriented boxes in a pure-Python workflow: without a CUDA kernel for rotated IoU (rIoU), their training and inference pipeline is penalized. Oriented R-CNN behaves well without that kernel, so it is the architecture we favor for now — and the one this walkthrough uses.
Quick start Link to heading
# 1. Create the project venv
uv venv --prompt odet-tutorials
source .venv/bin/activate

# Optional, if you already have an .envrc for this folder
# direnv allow

# 2. Clone oriented-det locally
git clone https://github.com/DL4EO/oriented-det.git
cd oriented-det

# 3. Install the local clone in editable mode
pip install -e .

# 4. Run inference on the Mac GPU and save the visualization
odet image-demo demo/demo.jpg \
  hf://oriented_rcnn_dota_le90_1x \
  --out-file result.jpg \
  --device mps \
  --score-thr 0.7 \
  --nms-thr 0.1
On first run, weights download automatically from Hugging Face (dl4eo/oriented-det-pretrained). To prefetch:
odet pretrained list
odet pretrained download oriented_rcnn_dota_le90_1x
Open result.jpg. That’s it.
Walking through it Link to heading
Install Link to heading
git clone https://github.com/DL4EO/oriented-det.git
cd oriented-det
pip install -e .
The editable install pulls in PyTorch, torchvision, albumentations, and the odet CLI from your local clone. No separate compiler step, no MMDetection config maze — and local code changes are immediately visible in the environment.
Use the demo image Link to heading
The oriented-det repo ships demo/demo.jpg: a bus parking lot where vehicles sit at diagonal angles — exactly the kind of scene where axis-aligned boxes waste pixels.
Run inference on macOS Link to heading
odet image-demo demo/demo.jpg \
  hf://oriented_rcnn_dota_le90_1x \
  --out-file result.jpg \
  --device mps \
  --score-thr 0.7 \
  --nms-thr 0.1
The hf://oriented_rcnn_dota_le90_1x checkpoint resolves its sidecar config automatically, so you do not need to find or pass a separate config file.
--device mps sends inference to Apple’s Metal GPU. On Linux or Windows, use cuda or cpu instead — same command, different backend.
Typical output:
Loading config: .../oriented-det/pretrained/oriented_rcnn_r50_fpn_dota_le90_1x-5b128e72.json
Loading checkpoint: .../oriented-det/pretrained/oriented_rcnn_r50_fpn_dota_le90_1x-5b128e72.pth
Loaded model from .../oriented-det/pretrained/oriented_rcnn_r50_fpn_dota_le90_1x-5b128e72.pth
Model type: oriented_rcnn
Number of classes: 15
Class names: ['baseball-diamond', 'basketball-court', 'bridge', 'ground-track-field', 'harbor', 'helicopter', 'large-vehicle', 'plane', 'roundabout', 'ship', 'small-vehicle', 'soccer-ball-field', 'storage-tank', 'swimming-pool', 'tennis-court']
Preprocessing: resize_mode=fixed, target_size=(1024, 1024) (model canvas 1024×1024)
Inference thresholds: score>=0.7, merge NMS IoU<=0.1, overlap_pixels=200, ignore_margin_pixels=0.0
Inference: demo/demo.jpg
  -> single forward (image 1024×1024 matches model canvas)
  -> 94 detections (score >= 0.7, NMS <= 0.1)
Saved visualization to result.jpg
Done.
The model knows the 15 DOTA classes (planes, ships, harbors, storage tanks, …), and the checkpoint metadata resolves readable class names automatically in the visualization.
What the flags mean Link to heading
| Flag | Value | Role |
|---|---|---|
demo/demo.jpg | input | Image to detect on |
hf://oriented_rcnn_dota_le90_1x | checkpoint | Oriented R-CNN weights plus sidecar config |
--out-file result.jpg | output | Where to write the visualization |
--device mps | Apple GPU | Metal acceleration on macOS |
--score-thr 0.7 | confidence | Keep boxes with score ≥ 0.7 |
--nms-thr 0.1 | NMS IoU | Suppress overlaps (lower = stricter) |
What’s next Link to heading
The oriented-det series continues with a technical deep-dive on fine-tuning models on Airbus datasets, then lessons learned chasing MMRotate parity on tiled validation.
References Link to heading
- oriented-det on GitHub
- Pretrained weights on Hugging Face
- DOTA dataset
- MMRotate — the earlier generation this simplifies away
- Previous post: Oriented-Det v0.1.0 is out